On the Wall: Mounting Supa Strip Anywhere You Want
Most LED projects start with a question: “Where do I hide the strip?”
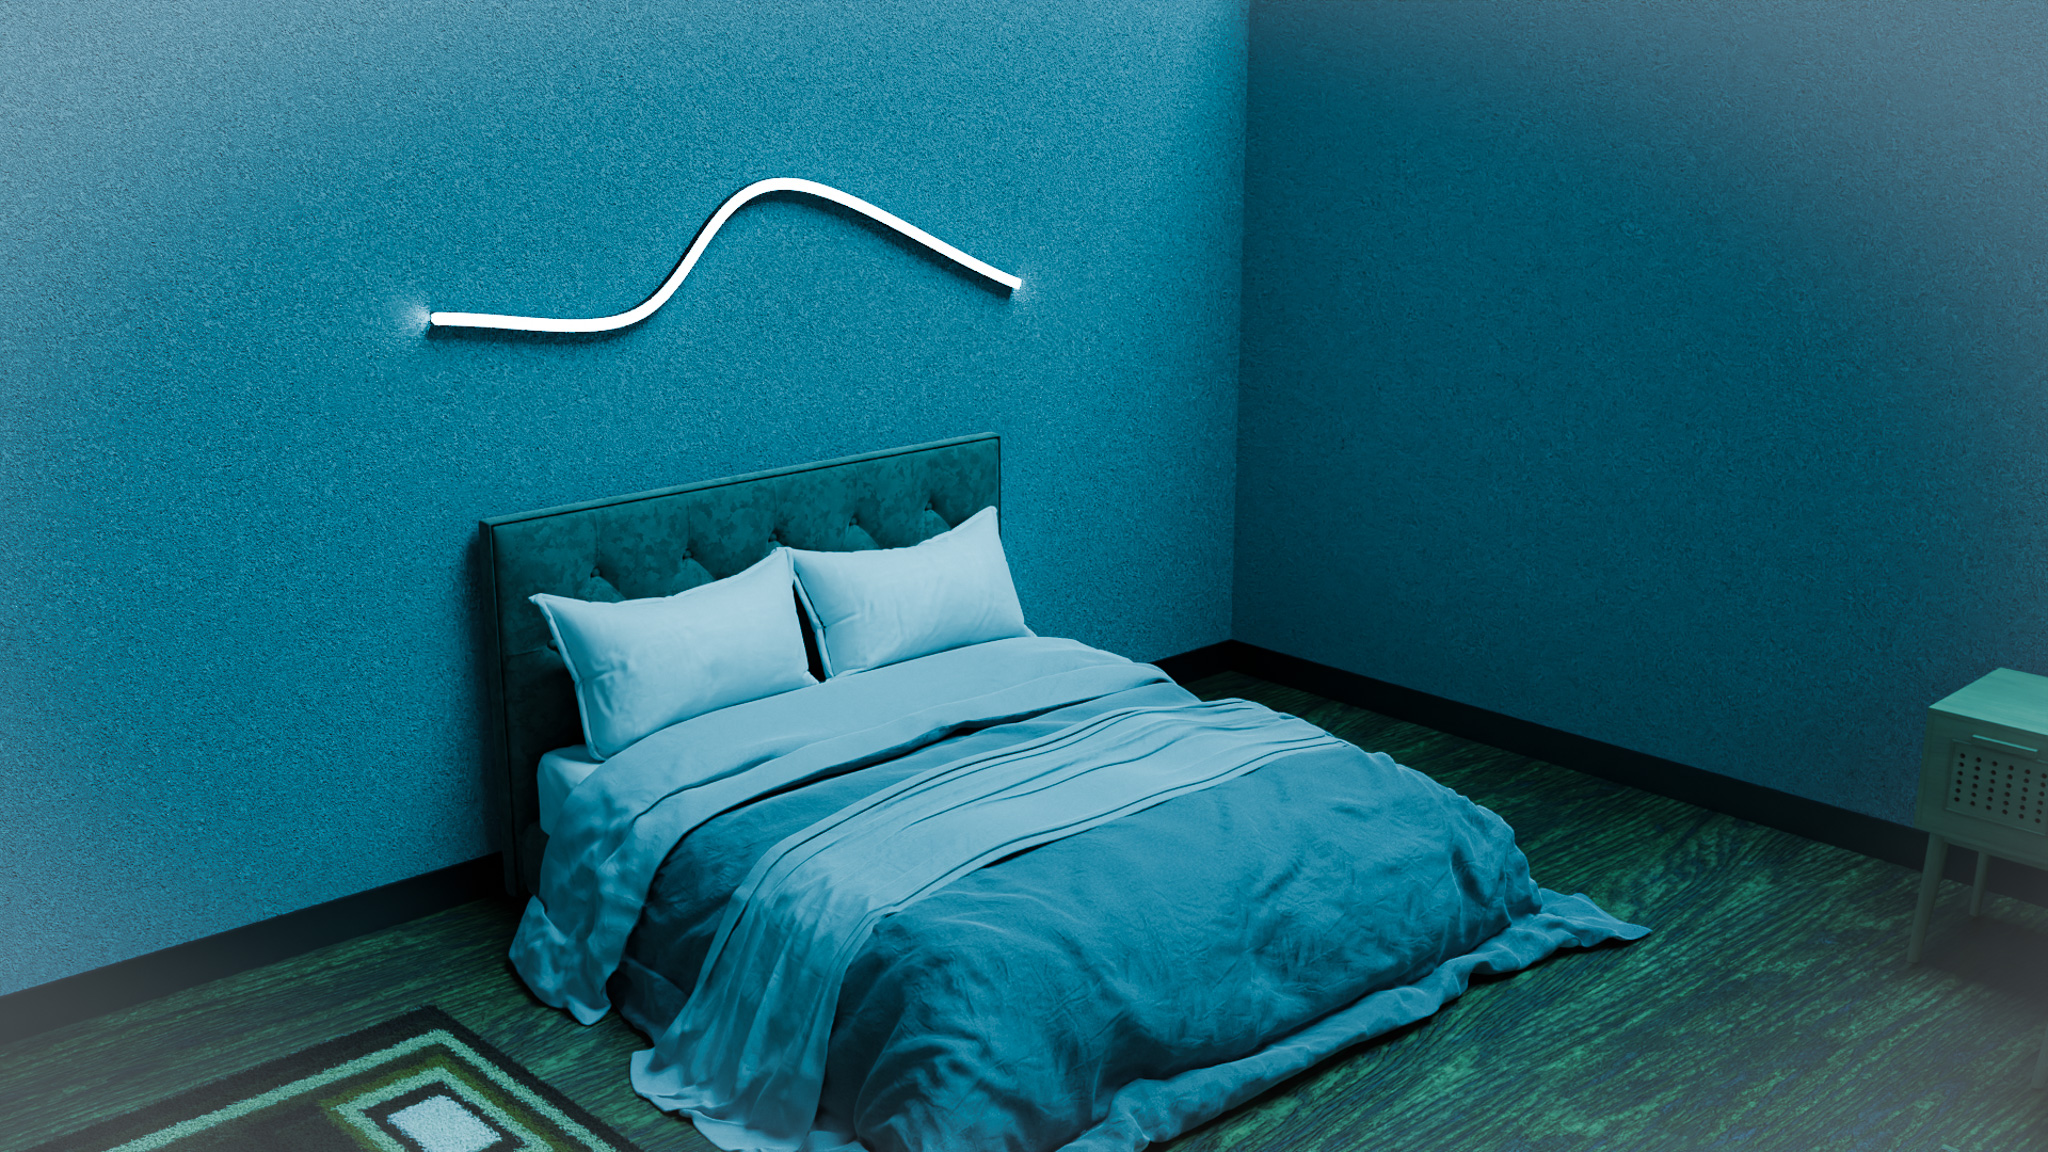
With Supa Strip, the answer is often: you don’t. You put it right on the wall.
Supa Strip is our 3-side neon CS8812 RGBW 4000K lightstrip in 2M and 5M runs with 144 LEDs/m and a flexible neon body. It’s bright enough, smooth enough, and clean enough to live in plain sight — running along your wall, around the ceiling, or straight up a corner.
You don’t need a recessed channel or fancy carpentry. Each Supa Strip comes with short aluminum clip mounts that you screw into the surface and simply press the neon tube into. The result: a neat, intentional light line that looks designed, not improvised.
In this article we’ll cover:
- Why Supa Strip actually looks good right on the wall
- How the aluminum clip mounts work in real installs
- Using bends and corners to wrap whole rooms
- Surface and layout ideas: walls, ceilings, desks, doors, and more
Key Takeaways
- Supa Strip is meant to be seen, not hidden: put it directly on walls, ceilings, or furniture.
- Included aluminum clip mounts make it easy to mount the neon tube in a clean, repeatable way.
- The flexible body and 3-side neon profile let you wrap corners and follow room lines.
- You can run a single strip across an entire wall or around a room as a statement piece.
- It pairs with Aura Strips and WLED if you want matching background or hidden lighting.
Always follow local electrical codes. If you’re unsure about mains-voltage wiring, consult a qualified electrician.
Supa Strip Is Designed to Be Seen
Most LED strips are a little… awkward to look at. Bare diodes, visible hotspots, and wiring that only really works if it’s all hidden in a cove.
Supa Strip flips that expectation. It’s a:
- 3-side neon tube with a soft, continuous glow
- 144 LEDs per meter, which means ultra-tight spacing
- RGBW 4000K strip inside, so you get both color and clean neutral white
Because the neon body glows from the front and both sides, you’re not staring at raw LED points or PCB traces. You’re seeing a simple, continuous line of light that looks intentional even when it’s mounted directly to drywall, brick, or painted wood.
“It just lives on my wall”
If you’ve ever hacked together a “temporary” strip that ended up staying for months, Supa Strip is that idea upgraded and formalized.
You can run it:
- Across the top of a wall
- Along a desk edge
- Down a corner and across the floor edge
- Around a doorway or window frame
…without hiding it. It looks like it belongs there.
Clip-In Aluminum Mounts: Small Parts, Big Difference
The unsung hero of Supa Strip wall installs is the short aluminum clip mount.
Each clip is essentially a low-profile metal saddle:
- You screw the clip to your surface (typically with small screws and wall plugs/anchors where needed).
- Once the clips are in place, you press the Supa Strip neon body into them.
- The tube snaps into the clip and stays there, but it’s not glued — so you can remove it later if you want.
Why aluminum clips?
Aluminum clips give you:
- Rigid, repeatable alignment – your line stays straight instead of sagging.
- Heat-friendly support – aluminum is comfortable near higher-power LED runs.
- A minimal visual footprint – once the Supa Strip is pressed in, you mostly just see the neon, not the hardware.
Because the clips are short, you can:
- Place them closer together for extra support (e.g., on ceilings or long horizontal stretches).
- Drop them right before and after a bend to keep that section neatly controlled.
The combination of flexible neon + rigid clips is what lets Supa Strip feel both sculptable and solid.
Around the Room and Into the Corner
One of the biggest advantages of Supa Strip is that the neon body bends, so it can follow the real geometry of your space instead of forcing you to stick to straight segments only.
A common real-world layout looks like this:
- Start at one corner of the room
- Run Supa Strip along the top of the wall
- Bend it gently around corners using the natural flexibility of the tube
- Finish on the opposite side of the room — or wrap all the way back to where you started
From a few steps back, it looks like a continuous neon band that traces the room.
Bending responsibly
A few quick guidelines:
- Respect the minimum bend radius of the neon profile; don’t fold or kink it.
- For inside and outside corners, use a gentle sweep instead of a sharp right angle.
- Place clips near the corner to prevent the strip from springing out or twisting.
Done right, you get that satisfying effect of a single line that runs across the wall, into the corner, and around the room, with no ugly breaks or sudden drops.
Where You Can Put Supa Strip
If you can screw in a clip, you can probably put Supa Strip there. Here are some classic wall- and surface-based layouts:
Along the ceiling line
- Run a 5M strip along the top of the wall, a few centimeters down from the ceiling.
- Use clips every 20–40 cm depending on how rigid you want it.
- Wrap corners and keep going as far as your power and layout allow.
This gives a floating ceiling outline, especially when you run neutral 4000K white at low brightness.
Vertical “light columns”
- Mount a 2M Supa Strip as a vertical line from floor to ceiling.
- Put one in each corner of a room, or behind your streaming setup.
This looks especially clean when combined with Aura Strips hidden behind the desk or TV for additional glow.
Along furniture edges
- Mount Supa Strip on the front lip of a desk, bar, or shelf.
- The 3-side neon glow means people see it from the front and the sides, not just straight on.
Because it’s clip-mounted, it feels more like a solid light bar than a floppy strip taped in place.
Doorways, windows, and frames
- Trace the perimeter of a door or window frame with a Supa Strip.
- Let the corners bend naturally while still respecting bend radius.
This creates a portal or frame effect, especially fun with WLED-based effects and color sweeps.
Text and shapes on walls
For more advanced installs:
- Use shorter segments and multiple Supa Strips to write letters or simple shapes.
- Clip the strips along your layout line.
The result is a neon-style wall graphic without needing glass tube bending or high-voltage gear.
Surface Types & Mounting Tips
Supa Strip and its clips work on most common surfaces:
- Painted drywall
- Wood and MDF
- Plywood, OSB, and shop walls
- Brick and masonry (with appropriate anchors)
- Metal beams or channels
A few simple tips:
- On drywall, use appropriate wall plugs/anchors if the strip will be tugged or bumped.
- On hard surfaces like brick or concrete, pre-drill and use masonry anchors.
- On furniture or cabinets, small wood screws into solid material are usually enough.
Always check your surface and fasteners; the clips are strong, but they only work as well as what they’re attached to.
Power and Cable Routing on the Wall
Since Supa Strip is meant to be visible, it’s worth thinking about how your power and data cables appear.
- Start the strip near a natural cable path: corner near a cabinet, behind a TV, or near a shelf.
- Run the power and controller cables down the corner or behind furniture where they’re less obvious.
- Use Aura Strips in hidden spots and keep Supa Strip as the main visible light element.
If you’re using WLED on ESP32:
- Mount the controller in a small enclosure near a power outlet.
- From there, run a neat cable bundle (power + data) to the start of Supa Strip.
- Keep grounds common and follow good power injection practices on longer runs.
The goal is to make the light line the star of the show, and the wiring a quiet background detail.
Supa Strip + Aura: Wall + Backlight Combo
A very popular setup is:
- Supa Strip: mounted directly on the wall as the visible neon outline.
- Aura Strips (96 LEDs/m): tucked behind monitors, inside coves, or under shelves to add background glow.
Because both Supa and Aura are 12V addressable strips, you can:
- Drive them from the same PSU and WLED controller (within safe power limits).
- Use WLED segments to give each its own effect or color theme.
The result: a room where the main visual lines are drawn by Supa Strip, and everything else is gently filled in by Aura.
FAQ
Do I need a channel or track to mount Supa Strip?
No. Supa Strip is designed to be mounted directly on surfaces using the included short aluminum clip mounts. Channels are optional, not required.
How often should I place the clips?
It depends on how rigid you want it, but a good starting point is:
- Every 20–30 cm for ceilings or long horizontal runs
- A clip before and after bends to keep corners neat
You can always add more clips later if you see any sagging.
Can Supa Strip wrap around a full room?
Yes, as long as you plan power correctly and respect the strip’s minimum bend radius. Use multiple injection points for longer runs and a PSU sized for your total wattage.
Does it look okay just “stuck on the wall”?
It doesn’t just look okay — that’s the whole point. The 3-side neon body and high LED density are what make Supa Strip look finished and intentional even when it’s fully exposed on the wall.
Can I take it down or move it later?
Yes. Because the neon body is pressed into aluminum clips instead of glued, you can:
- Pop the strip out of the clips
- Move it to a new layout
- Reuse the same Supa Strip in a new space
You may need to move or add new clips, but the strip itself is built to travel with you.
Supa Strip is for builders who don’t want to hide their work. Clip it up, bend it around the room, let it live right on the wall — and let the light line become part of the architecture, not just a glow behind it.